How to Illustrate a Children’s Book: Getting Started (Part 1)
WRITTEN BY ABI CUSHMAN
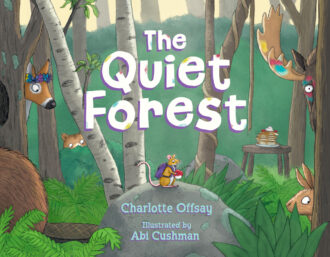
 In November 2021, I got an email from my agent. An editor at Paula Wiseman Books had an illustration job for me! It was a manuscript called The Quiet Forest, written by Charlotte Offsay, and it featured a cast of forest animals thrown into chaos by a mischievous mouse.
I was thrilled at the opportunity, but I felt a little apprehensive as well. Although I had illustrated three of my own picture books before, I had never illustrated someone else’s manuscript.
I want to share how I approached illustrating The Quiet Forest so if you’re wondering how to get started illustrating a children’s book that someone else wrote, you’ll have an idea of how to begin.
Note: If you’re wondering how to get illustration jobs, see my articles, Make Your Children’s Book Illustration Portfolio Unforgettable and How to Send Illustrator Promo Postcards to Art Directors.
Step 1: Doodle on the manuscript
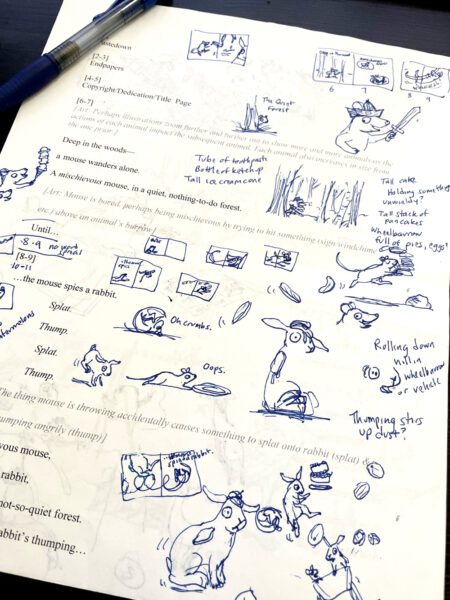
When I first received Charlotte’s manuscript, I printed it out and read through it a few times. Then I made little drawings in the margin of the paper. Any images that popped up when I was reading it got doodled in.

Now I had something to work with. Something to build on. This is key. It’s best to start small and simple. Otherwise, it can be pretty intimidating to think about the character and scenery design, the page turns, and the visual storytelling all at once.
Step 2: Make thumbnails of the page layouts
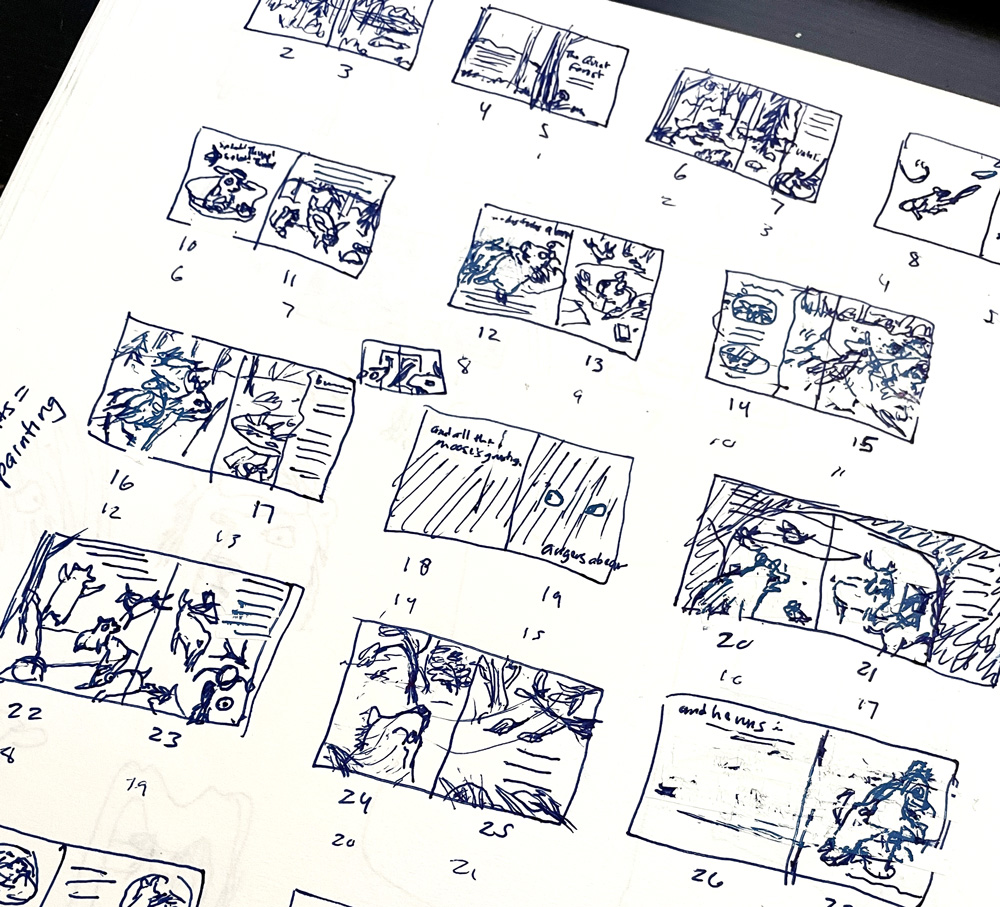
After I had some ideas for the characters and scenes, I was ready to move onto thumbnails. Thumbnail drawings are little squares that you draw to represent each page spread. Each square (or page) is only about an inch long.
Thumbnails are good because everything is still small, and you can figure out the best page layouts and page turns. This is also the stage when you figure out how to break up the text into an appropriate picture book length.
Picture books are usually 32 or 40 pages long, though some of these pages are used for copyright information, title page, and sometimes the endpapers. Tara Lazar has a great explanation of this with a diagram. You can also download thumbnail templates from Debbie Ridpath Ohi’s site.

Here are my initial thumbnail drawings for The Quiet Forest. I put what I thought was best for the page layouts and page turns.
At this point, even though the editor had paginated it into 32 pages, I felt like it needed more breathing room and laid out a 40-page version just to see. The editor and art director ended up being okay with the expanded version, so it worked out.
I think it’s important to try to do what’s best for the story. If you can fit it into a 32 page format, great! But otherwise, give a 40-page layout a try. That said, you really should try to fit the story into 32 or 40 pages unless there is an exceptionally good reason for a different number of pages, due to the way books are printed and also costs.
In my next article, I will show you how I moved on from the thumbnail stage to making a rough mockup of the book called a picture book dummy.
More Illustration Tips
- How to Illustrate a Children’s Book: Make a Picture Book Dummy (Part 2)
- How to Illustrate a Children’s Book: Revise the Sketches (Part 3)
- How to Illustrate a Children’s Book: Make the Final Art (Part 4)
- Make Your Children’s Book Illustration Portfolio Unforgettable
- How to Send Illustrator Promo Postcards to Art Directors
Share this Article:
